
A French seam is a professional, elegant finish for seams, ideal for lightweight or sheer fabrics․ It involves sewing twice, enclosing raw edges for a durable, neat result․
What is a French Seam?
A French seam is a professional sewing technique that encloses raw fabric edges within a stitched fold, creating a clean, durable finish․ It involves sewing two lines of stitches, first with wrong sides together to capture the raw edges, then folding the fabric right sides together and sewing again․ This method is ideal for lightweight or sheer fabrics, as it prevents fraying and creates a nearly invisible seam․ French seams are commonly used in garments requiring a polished look, such as lingerie, linings, or home decor items․ The result is a strong, neat, and professional-looking seam that is both functional and visually appealing․

Why Use French Seams?
French seams are favored for their durability and aesthetic appeal, making them ideal for projects requiring a professional finish․ They eliminate fraying, strengthen the seam, and provide a clean look, especially on lightweight or sheer fabrics․ Unlike basic seams, French seams enclose raw edges, reducing bulk and preventing unraveling․ This technique is perfect for garments like lingerie, where a delicate appearance is desired, and for home decor items needing a polished touch; Additionally, French seams are durable and long-lasting, making them suitable for high-stress areas․ They also add a professional touch, making them a popular choice among sewists aiming for high-quality results in their projects․
Common Fabrics for French Seams
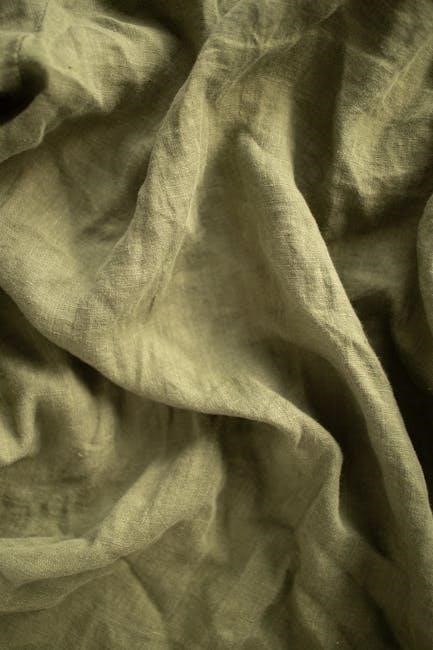
French seams are particularly well-suited for lightweight and sheer fabrics, such as voile, chiffon, and organza, where a clean, professional finish is essential․ These fabrics benefit from the enclosed raw edges, preventing fraying and maintaining a delicate appearance․ Additionally, French seams work beautifully with silk, cotton lawn, and other fabrics prone to fraying․ They are ideal for garments like blouses, dresses, and lingerie, where a refined look is desired․ French seams can also be used on medium-weight fabrics, though they are less commonly applied to heavy or thick materials․ The technique ensures a durable and polished finish, making it a versatile choice for various sewing projects;
Tools and Materials Needed
A sewing machine, sharp scissors, pins, a seam ripper, iron, and ironing board are essential for creating French seams․ Use high-quality fabric and matching thread for best results․
Sewing Machine
A sewing machine is the primary tool for sewing French seams․ While a standard machine works well, a serger can also be used for finishing seams․ Ensure your machine is set to a straight stitch, as this is essential for creating clean, precise lines․ A sharp universal needle is recommended to prevent fabric damage and ensure smooth stitching․ Before starting, test your machine’s tension to avoid puckering or uneven stitches․ For the first seam, use a 1/4-inch seam allowance, then adjust as needed for the final fold․ Proper machine setup and maintenance are crucial for achieving professional-looking French seams․ Always keep a spare needle handy and clean your machine regularly for optimal performance․
Fabric and Seam Allowance
French seams are ideal for lightweight fabrics like cotton, silk, or voile․ Use a 1/4-inch seam allowance for the first pass, then fold and sew at 1/2-inch for the final seam․ This ensures raw edges are enclosed․ For heavier fabrics, adjust the allowance slightly but maintain precision․ Always pre-wash fabric to prevent shrinkage after sewing․ Accurate seam allowances are crucial for a professional finish, so measure carefully before stitching․ This technique works best with fabrics that can be folded neatly without bulk, ensuring a smooth, invisible seam․ Proper alignment and even tension are key to achieving a flawless French seam on any fabric type․
Other Essential Tools
Besides a sewing machine, essential tools for French seams include sharp scissors, rotary cutters, and a cutting mat for precise fabric cutting․ A seam ripper is handy for correcting mistakes without damaging fabric․ Tailor’s tape ensures accurate measurements, while pins keep fabric aligned during sewing․ Iron and ironing board are crucial for pressing seams flat, enhancing the professional finish․ Optional tools like a walking foot or edge-stitching foot can aid in smooth stitching, especially on delicate fabrics․ These tools collectively help achieve the neat, enclosed seams characteristic of French seam construction, making the process efficient and precise․
Step-by-Step Guide to Sewing a French Seam
Master the French seam technique with a clear, step-by-step guide, ensuring professional results for lightweight or sheer fabrics, perfect for garments requiring a clean, elegant finish․
Step 1: Pinning the Fabric
Pinning is the first crucial step in sewing a French seam․ Begin by placing the fabric pieces with wrong sides together, carefully aligning the edges to ensure accuracy․ Use straight pins to secure the fabric, spacing them evenly about 2-3 inches apart․ For curved seams, additional pins may be necessary to maintain the shape and prevent distortion; Gently smooth the fabric as you pin to avoid wrinkles or bubbles․ Proper pinning ensures that the seam will lie flat and even, setting the foundation for a professional finish․ Make sure the pins are positioned perpendicular to the edge for easy removal while sewing․
Step 2: Sewing the First Seam

With the fabric pinned, place it under the sewing machine’s presser foot, aligning the edge with the machine’s guide․ Sew a straight stitch along the pinned edge, using a seam allowance of about 1/4 inch․ Maintain a steady pace and keep the fabric smooth as it moves under the needle․ Ensure the stitch length is appropriate for the fabric type․ Once the first seam is complete, carefully remove the pins as you go․ This initial stitch line will guide the subsequent steps, so accuracy is key․ The first seam sets the foundation for enclosing the raw edges in the next steps of the French seam process․
Step 3: Trimming the Seam Allowance
After sewing the first seam, carefully trim the seam allowance to half its original width using sharp scissors or rotary cutters․ Be precise to avoid cutting too close to the stitches, as this could weaken the seam․ Trim evenly along the entire length, ensuring no excess fabric remains․ This step is crucial for creating a clean, professional finish․ Trimming reduces bulk and prepares the seam for the final folding and sewing step․ Work slowly, especially around curves or corners, to maintain accuracy․ This step ensures the French seam will lie flat and look neat when completed․ Proper trimming is essential for achieving the desired result in a French seam;
Step 4: Pressing the Seam
Pressing the seam is a critical step to ensure a professional finish․ Using a hot iron with steam, press the seam flat on both sides to create a crisp fold․ This step helps the fabric lie smoothly, preparing it for the final fold and sewing․ Gently press without stretching the fabric, especially if working with delicate materials․ Pressing ensures the seam allowance is evenly distributed and sets the foundation for a clean, enclosed finish․ Proper pressing makes the next step of folding and sewing much easier and ensures the French seam will look neat and professional․ Take your time to press thoroughly for the best results․
Step 5: Folding and Sewing the Final Seam

After pressing, fold the fabric along the pressed seam, bringing the right sides together․ Align the edges carefully to ensure they match perfectly․ Sew along the folded edge using a smaller seam allowance, typically half of the original, to enclose the raw edges completely․ This step creates the final, clean French seam․ Use a straight stitch and maintain consistent tension to avoid puckering․ Backstitch at the beginning and end for strength․ The result is a durable, nearly invisible seam with no exposed edges, ideal for delicate or sheer fabrics․ This step completes the French seam process, ensuring a professional and long-lasting finish․

Advanced Techniques and Tips
Mastering French seams involves refining techniques for curved edges and reversible projects․ Precision and patience are key to achieving polished, professional results in advanced sewing․
Working with Curved Seams
Curved seams add elegance to projects but require extra care․ To master French seams on curves, pin fabric carefully, ensuring smooth alignment․ Sew the first seam with a narrow allowance, then trim evenly․ Use scissors or a rotary cutter for precise trimming; Press the seam gently to avoid distorting the curve․ When folding for the final seam, ensure the raw edges are fully enclosed․ For tight curves, clip the seam allowance slightly to allow the fabric to lie flat․ Use a hot iron to press the curve, shaping it naturally․ This technique ensures a professional finish, even on intricate designs, making your project both durable and visually appealing․
French Seams for Reversible Projects
French seams are perfect for reversible projects, as they create a polished look on both sides․ Start by sewing the first seam with wrong sides together․ Trim the allowance neatly, ensuring no fraying․ Press the seam, then fold the fabric right sides together, enclosing the raw edges․ Sew the second seam, creating a seamless finish visible from neither side․ This method is ideal for garments like reversible dresses or bags, where a clean interior is as important as the exterior․ By following these steps, you achieve a professional, reversible design that looks stunning inside and out, perfect for showcasing your fabric choices on both sides․

Additional Resources and Troubleshooting

Watch video tutorials for visual guidance and troubleshooting tips․ Address common mistakes like uneven trimming or misaligned seams to ensure a flawless French seam finish every time․

Video Tutorials for Visual Learners
Video tutorials are an excellent resource for mastering French seams․ They provide step-by-step visual guidance, making it easier to understand and execute each stage of the process․ Many tutorials demonstrate how to align fabric, sew the initial seam, trim excess, and press for a professional finish․ Some videos also cover variations, such as working with curved seams or reversible projects․ By watching experienced sewists, you can avoid common mistakes and gain confidence in your technique․ Additionally, these tutorials often include tips for troubleshooting issues like uneven stitching or misaligned seams, ensuring a polished result․
Common Mistakes and Solutions
One common mistake when sewing French seams is incorrect seam allowance․ Ensure to use the recommended allowance for your fabric type to avoid uneven edges․ Another error is improper trimming, which can lead to fraying․ Always trim carefully, leaving enough fabric for the second seam․ Misaligned fabric during the second seam is another issue; pin thoroughly to maintain accuracy․ Pressing inadequately can also result in a bulky finish; use steam and a hot iron for crisp folds․ Lastly, rushing through steps can cause puckering or missed stitches․ Take your time, and double-check each step to achieve a flawless French seam․